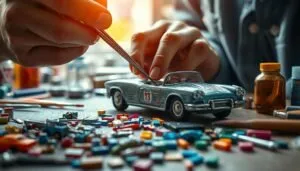
Diecast models, with their intricate details and realistic appearance, hold a special place in the hearts of collectors and hobbyists. Accidents happen, and a broken diecast model can be heartbreaking. Fortunately, with the right approach, many breaks can be repaired, restoring your cherished models to their former glory. This guide provides a step-by-step approach to fixing broken diecast models, ensuring you can confidently tackle repairs and preserve your collection for years to come. Learn how to fix broken diecast models in 5 simple steps.
Diagnosing the Damage
Before reaching for any tools or adhesives, a thorough diagnosis is crucial. Understanding the extent of the damage is the first and most important step in the process. This initial assessment guides the selection of appropriate repair methods and materials. Carefully examine the broken pieces, noting how they fit together and the type of break. This analysis ensures that you don’t miss any critical steps during the repair and provides a solid foundation for successful restoration. A well-thought-out diagnosis prevents further damage and saves time and resources during the repair process.
Identifying the Broken Parts
Identifying which parts are broken is the initial phase of diagnosing the damage. Check all aspects, including the body, chassis, wheels, and any detached accessories. This detailed inspection determines the extent of the repair needed. Take note of any missing fragments. If parts are missing, you will need to consider whether to source replacement parts or create them, which affects the complexity of the repair and the tools needed. This initial assessment allows you to prepare the necessary materials and tools for the job.
Assessing the Severity of the Break

After identifying the broken parts, assess the severity of the break. Consider the type of break, whether it’s a clean snap, a shattered piece, or a crushed area. Clean breaks are generally easier to repair than complex fractures. Additionally, assess the accessibility of the broken areas. Some parts are easily accessible, while others may be hidden or require disassembly to reach. Evaluate the overall damage to determine the best course of action and expected level of difficulty. Understanding the severity helps set realistic expectations and guides the selection of the most effective repair techniques.
Gathering Essential Tools and Materials
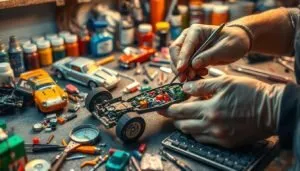
Having the right tools and materials is critical for successful diecast model repair. A well-equipped workspace makes the repair process more efficient and improves the quality of the results. This step covers the essential items you’ll need, from adhesives to finishing materials. Ensuring you have everything ready before starting the repair saves time and minimizes frustration. Properly prepared materials and tools are essential for completing repairs with precision and achieving a professional finish.
Adhesives and Glues Selection
Choosing the correct adhesive is crucial for a durable and aesthetically pleasing repair. Super glue (cyanoacrylate) is a common choice for its fast-drying properties and strong bond. Epoxy glues provide a stronger bond, which is suitable for heavier parts or areas subject to stress. For delicate parts, specialized plastic model glues can work well because they are formulated to bond to various plastics. When selecting an adhesive, consider the materials being joined and the required strength. Experimenting with different adhesives on scrap materials is a good way to determine the best option before applying it to your valuable model. Remember, the correct adhesive provides a lasting bond.
Tools for Precision Repair

The appropriate tools enhance the accuracy and quality of the repair. Essential tools include a hobby knife for cutting and trimming, tweezers for handling small parts, and various clamps to hold pieces together while the glue sets. A pin vise with small drill bits can be used to add pins for extra strength in the repair. Fine-grit sandpaper and files are crucial for smoothing surfaces and preparing them for painting. Having these tools readily available allows you to handle delicate parts with care and achieve professional-looking results.
Step 1 Cleaning and Preparation
Preparation is a vital step for successful repairs. It ensures that the adhesive bonds properly and the finished product looks its best. The initial cleaning and preparation significantly impact the repair’s strength and appearance. This involves removing old glue, debris, and preparing the surfaces to be joined. Proper preparation creates the ideal surface for bonding, ensuring the repair is strong and aesthetically pleasing. This step focuses on establishing a clean working environment to facilitate precision and quality.
Removing Debris and Old Glue
Carefully remove any old adhesive or debris from the broken surfaces. Use a hobby knife or a fine-tipped tool to gently scrape away old glue, being careful not to damage the model’s surfaces. If the parts were previously glued, the old adhesive might prevent a secure bond. Clean surfaces improve adhesion, ensuring the new glue has a clean surface to adhere to. This step lays the groundwork for a strong and lasting repair by ensuring clean surfaces. Removing debris is a crucial step for optimal bonding.
Cleaning the Surfaces to be Bonded

After removing debris and old glue, clean the bonding surfaces to ensure they are free from dust, grease, and any contaminants. Use a cotton swab dipped in isopropyl alcohol or a mild degreaser to wipe the surfaces. This ensures that the adhesive bonds effectively. Let the surfaces dry completely before applying glue. Clean surfaces are essential for achieving a strong and durable bond. Proper cleaning and preparation guarantee a solid connection between the repaired parts.
Step 2 Applying the Adhesive
Applying the adhesive is a crucial step where precision and care ensure a durable bond. The choice of adhesive, whether super glue or epoxy, depends on the material and the type of break. This stage requires careful application, avoiding excess glue, which can cause unsightly residue. Applying the adhesive correctly guarantees a strong bond and a clean finish, preserving the model’s original aesthetics. Understanding these techniques is essential for the effectiveness and visual appeal of the final repair.
Precise Adhesive Application Techniques
For precise application, use a toothpick or a fine applicator to apply the adhesive. Apply a thin, even layer of glue to one or both surfaces to be joined. This technique allows for greater control and prevents glue from spreading beyond the repair area. Working in a well-ventilated area ensures safety. Applying the adhesive with precision leads to a stronger bond and cleaner finish, which minimizes the need for excessive cleanup and enhances the overall appearance of the restored model.
Avoiding Excess Glue
Avoid using too much glue, as excess adhesive can seep out and create unsightly residue. Applying a thin layer will minimize the risk of glue overflow. If excess glue occurs, clean it immediately with a cotton swab or a specialized solvent while it is still wet. The goal is to apply enough glue to secure the parts without compromising the model’s finish. Minimizing excess glue prevents the need for extensive cleanup and improves the appearance of the repair, making it less noticeable and more professional-looking.
Step 3 Aligning and Holding the Parts
Accurate alignment and firm holding are essential for a successful repair. This step involves carefully positioning the broken parts and using various methods to hold them in place while the glue sets. Proper alignment ensures that the model’s original shape is maintained and that the repair is not visually apparent. Proper clamping techniques and allowing sufficient setting time are crucial for the final result.
Clamping Techniques for Accurate Alignment
Use clamps, rubber bands, or tape to hold the parts together while the glue dries. Clamps apply consistent pressure, ensuring a tight bond and accurate alignment. When using clamps, protect the model’s surface by placing soft material such as wax paper or tape. The goal is to hold the parts firmly in place without damaging the model. Selecting the correct clamping methods based on the size and shape of the part is crucial. Achieving precise alignment guarantees the repaired model looks as good as new, restoring its original aesthetics.
Holding the Pieces Until the Glue Sets
Allow ample time for the glue to set completely before removing any clamps or tape. The setting time varies based on the adhesive used. Super glue sets quickly, but epoxy glues need more time. Refer to the adhesive’s instructions for the recommended setting time. Avoid handling the model during this period to prevent disturbing the bond. Patience is essential, as rushing this step can lead to a weakened bond and necessitate the need for a repeat repair. Giving the glue enough time to cure ensures a durable, lasting repair.
Step 4 Finishing and Detailing
Once the glue has set and the parts are securely bonded, the finishing and detailing stage begins. This phase involves removing any excess glue, smoothing imperfections, and repainting or touching up the model to restore its appearance. The care taken during this step determines the visual quality of the repair, making it seamless and nearly invisible. This part is crucial for achieving a professional finish and restoring the model’s original aesthetics, which enhances the model’s value.
Removing Excess Glue and Imperfections
After the glue has completely dried, examine the repair area for any excess glue or imperfections. Use a hobby knife or fine-grit sandpaper to carefully remove any excess glue. Smoothing the surface, so that it is flush with the surrounding area. This part is crucial for creating a seamless repair. Take your time and work with precision to avoid causing more damage. A smooth surface is necessary for a successful repainting, allowing the model to look as good as new.
Matching Colors and Repainting
If the repair involves repainting, carefully match the original color of the model. Consider using model paints designed specifically for the material. Apply thin, even coats of paint to the repaired area, allowing each coat to dry before adding the next. This technique avoids paint buildup and ensures a smooth, consistent finish. Matching the colors and applying the paint with precision is crucial to making the repair less visible. This ensures the model’s aesthetics are maintained.
Step 5 Final Inspection and Care
The final step involves a thorough inspection of the repair and some maintenance tips. This includes checking the stability of the repair, inspecting the finish, and making any necessary adjustments. Following these steps ensures that the model is restored to its original condition. Proper maintenance ensures the model remains in great shape for many years to come. Careful inspection and maintenance prolong the life and beauty of your diecast models.
Checking the Repair for Stability
After all the steps, inspect the repair for stability. Gently test the bonded area to ensure it is strong and that the parts are securely joined. Check for any movement or weakness. If you notice any issues, consider reapplying adhesive or adding additional support, such as pins. Make sure all the components are correctly attached and that the repair does not compromise the model’s structural integrity. A stable repair ensures the longevity of the model.
Long-Term Care and Maintenance Tips
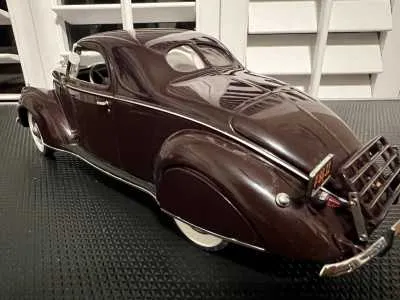
To ensure the longevity of your repaired diecast models, provide proper care. Store your models in a dry, dust-free environment, away from direct sunlight and extreme temperatures. Regularly clean the models with a soft cloth to remove dust and debris. Handle the models with care and avoid dropping them. Regular maintenance enhances the appearance of the model and prevents further damage. By following these care tips, you can keep your models in excellent condition for many years to come, preserving your investment and the joy they bring.
Fixing broken diecast models can be a rewarding hobby. By following the 5 steps outlined, you can breathe new life into your treasured collectibles. From diagnosing the damage and gathering the right tools to applying the adhesive, aligning the parts, and completing the finishing touches, each step is critical. With patience and precision, you can achieve professional-quality repairs that restore the beauty and value of your diecast models. Embrace the satisfaction of a job well done and the joy of preserving these miniature masterpieces for years to come!