What is Diecast Car Glue
Diecast car glue is a specialized adhesive designed to bond the various components of a diecast model car. These models, made from metal and plastic, require a strong yet precise adhesive to hold them together. Unlike general-purpose glues, diecast car glue is formulated to work effectively with the specific materials and delicate nature of these miniature vehicles. The right glue ensures that parts stay securely attached, preserving the model’s appearance and value for collectors. This glue plays a vital role in both the assembly and repair of diecast cars, ensuring the model remains intact and visually appealing.
Understanding the Importance of Glue
The importance of using the correct glue in diecast car assembly and repair cannot be overstated. A reliable adhesive prevents parts from detaching, preserving the model’s structural integrity. Moreover, the type of glue used can affect the final appearance of the model. Improper glue can lead to unsightly residue, damage the paint, or even corrode the metal components. A high-quality diecast car glue, on the other hand, offers a clean, strong bond without compromising the model’s aesthetics. For collectors, the choice of glue is crucial in maintaining the value and condition of their prized possessions. Proper gluing also ensures that the model can withstand handling and display without falling apart.
Different Types of Diecast Car Glue

Several types of adhesives are suitable for diecast car projects, each with its own strengths and weaknesses. The choice of glue depends on the specific needs of the project, the materials involved, and the desired outcome. It’s important to understand the characteristics of each type to make an informed decision. The right choice can simplify the process while guaranteeing durability and visual appeal. Some of the most common glues used for diecast cars include super glue, epoxy resin, and other specialized adhesives, each with its own unique formulation and application methods.
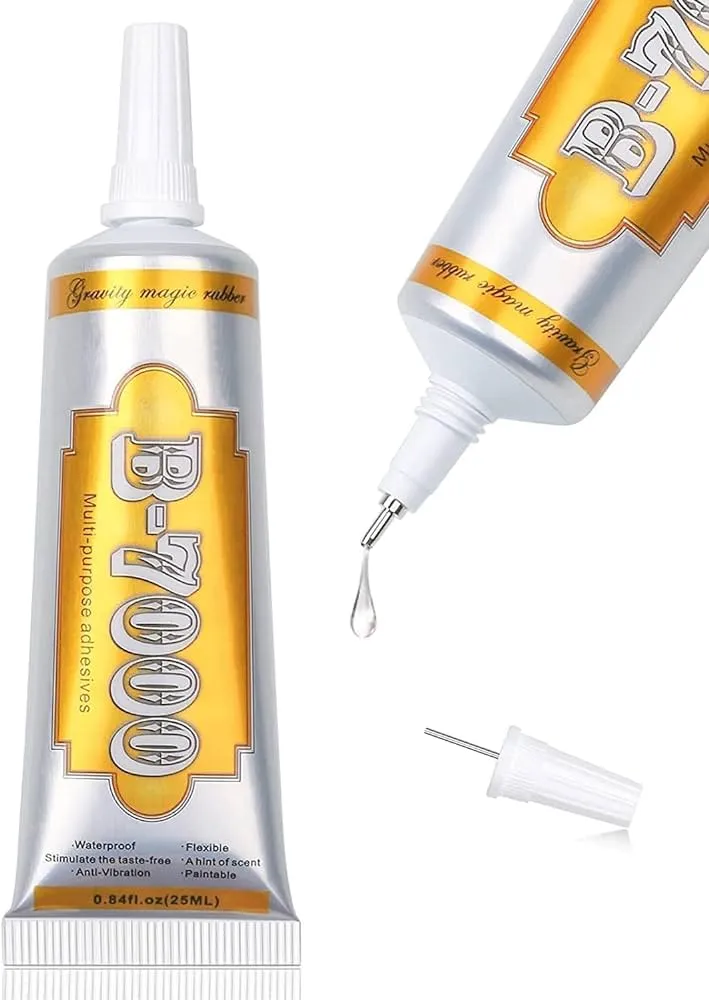
Super Glue for Diecast Cars
Super glue, also known as cyanoacrylate adhesive, is a popular choice for diecast car projects due to its quick-setting properties and strong bonding capabilities. It works well on a variety of materials commonly found in diecast models, including metal and plastic. Super glue is easy to apply, typically coming in a convenient tube or bottle with a fine nozzle for precision application. However, because it dries very quickly, it requires careful handling and accurate placement of parts. A small amount often goes a long way, so it’s important to use it sparingly to avoid overflow and potential damage to the model’s finish.
Pros and Cons of Using Super Glue
Pros of using super glue include its fast setting time, strong bond, and ease of use. It is widely available and relatively inexpensive. Cons include the risk of bonding skin, potential for clouding clear parts if too much is used, and the fact that it can be brittle. The quick-drying nature of super glue requires precision, making it less forgiving if parts are not aligned correctly initially. It’s also essential to avoid contact with the skin and work in a well-ventilated area to minimize exposure to fumes. Considering both the advantages and disadvantages is crucial to ensure the best results.
Epoxy Resin for Diecast Cars

Epoxy resin offers an alternative approach to gluing diecast car components, providing a robust and durable bond. Epoxy resins are two-part adhesives consisting of a resin and a hardener that, when mixed, create a strong, chemical-resistant bond. They are particularly effective for filling gaps and providing structural support. While epoxy takes longer to set than super glue, it offers greater flexibility and allows for repositioning of parts during the setting process. Epoxy resin is an excellent choice for repairs involving larger parts or for projects that require a strong, permanent bond capable of withstanding stress.
Pros and Cons of Using Epoxy Resin
Pros of epoxy resin include its superior strength, gap-filling capabilities, and resistance to chemicals and solvents. It provides a permanent bond that can withstand considerable force. The slower setting time provides more time for adjustment and precise positioning of the parts. Cons include the longer curing time, potential for dripping or running, and the need for precise mixing of the resin and hardener. It’s essential to follow the manufacturer’s instructions carefully to ensure the epoxy sets correctly and achieves the desired bond strength. Proper ventilation is also recommended when working with epoxy resins.
Other Adhesives to Consider
In addition to super glue and epoxy resin, other adhesives may be suitable for specific diecast car applications. Plastic cement is often used for bonding plastic components together, creating a fused joint. Contact cement is useful for large surface areas, such as attaching interior parts. For delicate details, such as attaching small accessories, a specialized hobby glue or a gel-type super glue might be preferred for greater control. Each adhesive has its unique characteristics, and selecting the correct one depends on the materials involved and the intended application. It’s always wise to test the glue on scrap material before applying it to the model to avoid any undesirable outcomes.
How to Choose the Right Glue

Choosing the right glue involves considering several factors to ensure a successful and durable bond. The materials of the parts being joined, the size and nature of the damage (if any), and the desired finish all play a crucial role. Understanding these factors will guide you in selecting an adhesive that best fits your needs. This process will enhance the model’s structural integrity and preserve its visual appeal.
Consider the Materials
The materials of the diecast car parts are critical when selecting the right glue. Super glue works well with metal and most plastics. However, some plastics may require a specific plastic-bonding super glue. Epoxy resin is a versatile choice for various materials, including metal, plastic, and some composite materials, offering a robust bond. Plastic cement is specifically designed for plastic parts, creating a chemical bond that fuses the plastic together. When working with clear parts, such as windows or lights, ensure the glue you choose will not cloud or discolor the clear plastic. Always check the glue’s compatibility with the materials before applying it to your model.
Assess the Damage
The type and extent of damage or the nature of the assembly task will significantly influence your glue choice. For small cracks or broken parts, super glue might be sufficient due to its quick setting time and strong bond. If there are larger gaps or missing pieces, epoxy resin may be preferable as it provides gap-filling capabilities and greater structural support. For delicate repairs, like attaching small details, a gel-type super glue or a specialized hobby glue with precise applicators would be ideal. Assessing the damage accurately ensures the selected glue offers the necessary strength and flexibility to restore the model effectively.
Prepare Your Diecast Car

Preparing your diecast car properly before applying glue is essential for achieving a strong and durable bond. This process involves cleaning the surfaces, gathering the necessary tools, and ensuring the parts fit together as intended. Attention to these details ensures that the glue adheres effectively, maximizing the chances of a successful repair or assembly project. Skipping these steps can lead to weak bonds or an unsatisfactory finish, so taking the time to prepare the model will pay dividends in the long run.
Cleaning the Surfaces
Cleaning the surfaces of the parts is a crucial step in the preparation process. Any dirt, grease, or old glue residue can interfere with the adhesive’s ability to bond properly. Use a mild solvent, such as isopropyl alcohol, to clean the surfaces of the parts that will be joined. Apply the solvent to a soft cloth or cotton swab and gently wipe the surfaces, removing any contaminants. Allow the parts to dry completely before applying the glue. Properly cleaned surfaces ensure the glue adheres effectively and creates a strong, lasting bond, contributing to the model’s longevity and aesthetic appeal.
Gathering Your Tools
Having the right tools on hand can streamline the gluing process and improve the accuracy of your work. Assemble essential tools, including the chosen glue, applicators (such as toothpicks, needles, or precision glue tips), a hobby knife or X-Acto knife, and any necessary clamps or tape to hold the parts in place while the glue sets. Also, have a clean work surface protected with a non-stick mat or paper. A well-equipped workspace will allow you to handle the gluing process with greater precision and confidence, resulting in a cleaner, more professional finish. Having the right tools beforehand eliminates delays and helps prevent mistakes.
Gluing the Parts Together

Applying the glue and joining the parts together is a critical step in diecast car repair or assembly. Proper application and positioning of the parts are essential for achieving a strong and visually pleasing result. The following guidelines will help you master this process and achieve professional results, from applying the adhesive to carefully joining the pieces and allowing them to set properly.
Applying the Glue
Apply the glue sparingly and precisely to the surfaces you intend to join. Avoid excessive amounts of glue, as this can lead to a messy finish and might affect the model’s appearance. When using super glue, a tiny drop is often enough. For epoxy resin, follow the manufacturer’s instructions for mixing and applying the glue. Use a toothpick, needle, or precision applicator to apply the glue accurately to the intended areas. If possible, apply the glue to one surface and then bring the parts together. This method minimizes the risk of applying too much glue and helps maintain control during the bonding process. Remember, less is often more when it comes to glue application.
Joining the Pieces
Carefully align the parts you are joining and hold them firmly in place. This ensures that the pieces are correctly positioned. If using super glue, the parts will bond quickly, so it’s essential to ensure precise alignment before the glue sets. For epoxy resin, you’ll have more time to make adjustments. Use clamps, tape, or other holding devices to secure the parts in the desired position while the glue dries. This will prevent the pieces from shifting and guarantee a solid bond. Be patient and take your time to ensure perfect alignment before the glue completely cures.
Curing and Setting the Glue

The curing and setting phase is critical for achieving a strong bond. It’s crucial to allow the glue to cure fully according to the manufacturer’s instructions. This process involves proper drying time and handling the model carefully. Patience during this phase will guarantee the durability and integrity of your diecast car assembly or repair.
Allowing for Proper Drying Time
Always allow the glue to dry completely before handling or displaying the model. The drying time varies depending on the type of glue used. Super glue sets quickly, often within seconds or minutes, but it still needs time to cure completely. Epoxy resin typically requires a longer curing time, often several hours or even overnight. Refer to the manufacturer’s instructions for specific recommendations. Avoid applying stress or force to the bonded parts during the drying period, as this could weaken the bond. Proper drying time ensures the glue reaches its maximum strength and the repair or assembly is durable.
Handling and Finishing Touches
After the glue has completely dried, handle the model carefully and inspect the glued areas. If there is any excess glue, carefully trim it away with a hobby knife or gently sand it down with fine-grit sandpaper. Consider adding any necessary finishing touches, such as painting small areas to match the original color or applying clear coat for added protection. Check for any imperfections and make the necessary corrections to achieve a flawless finish. With proper attention to detail, your diecast car will look as good as new.
Top 5 Diecast Car Glue Secrets

Secret 1
Always clean the surfaces of the parts before gluing, using isopropyl alcohol or a similar solvent. This removes any grease, dust, or old glue residue, ensuring a stronger bond.
Secret 2
Use the right glue for the job. Consider the materials involved. Super glue works well for metal and many plastics, but epoxy resin is better for filling gaps and providing structural support.
Secret 3
Apply glue sparingly. A small amount often suffices. Excess glue can create a mess and affect the model’s appearance. A toothpick or precision applicator can help with controlled application.
Secret 4
Always allow the glue to dry completely, following the manufacturer’s instructions. Be patient. Avoid handling the model or putting stress on the glued areas during drying time.
Secret 5
For the best results, invest in a set of quality tools, including a hobby knife, clamps, and various applicators. These tools will significantly improve the accuracy of your repairs and assembly projects.